6 min read
Add Auto Captions to Video on Your Phone
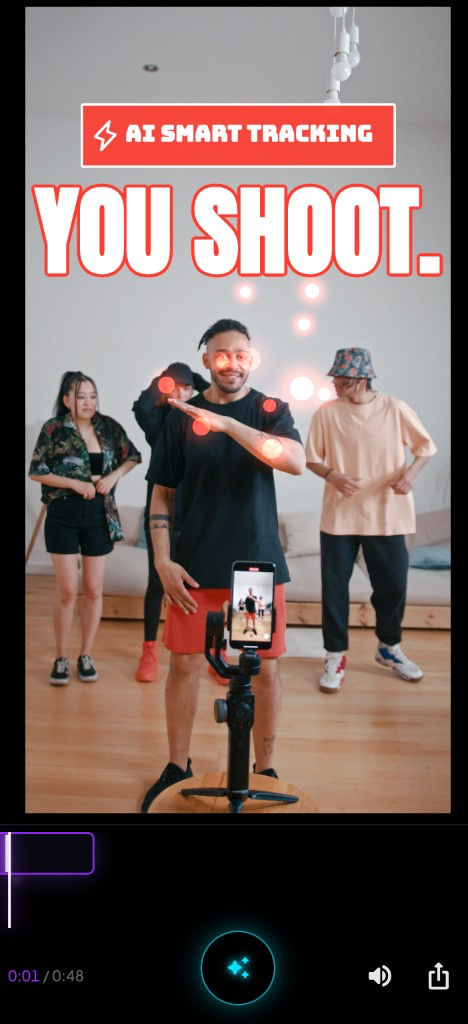
To add auto captions to a video on your phone, import a finished clip into CapCut, Instagram’s built-in Captions tool, a caption-only app, or a polish app — then generate speech-to-text, fix names and line breaks, style for the safe zone, and export burned-in text. For Reels, TikTok, and Shorts, burned-in captions beat platform-only captions because styling stays consistent and viewers can’t turn them off by accident.
The real decision isn’t “can my phone caption this?” — every major path can. It’s which job you’re finishing: readable subtitles only, or a post-ready Reel with captions plus timed accents in one pass.
What “done” looks like for phone captions
Most creators searching “add captions to video” or “auto captions” already have a cut. The clip is filmed. What’s missing is the retention layer people expect on mute:
- Words on screen when you speak — timed to speech, not a static block that lags half a second
- Readable in the middle third — not under the username, not under the action bar
- Burned into the export — so the look survives every platform’s UI
Caption-only tools stop there. Full editors keep going into timelines. A third path — one-pass polish — treats captions as part of finishing the clip: animated text, emphasis graphics, and optional timed sound effects (impacts, whooshes, stings) on the hits. Not a music bed. Not a multi-track rebuild.
Four ways to add auto captions on phone (compared)
| Path | Best for | Hands-on time (15s talking clip) | Cost shape | Weak spot |
|---|---|---|---|---|
| Instagram Captions | Posting in-app tonight | ~2–5 min | Free | Limited style; tied to IG draft |
| CapCut Auto Captions | Already editing in CapCut | ~10–25 min | Free (core captions) | Cleanup + timeline gravity |
| Caption-only apps (Submagic, Captions, Just Captions, etc.) | Volume + branded caption presets | ~3–8 min | Free tier → ~$10–30/mo | Captions only — still need effects elsewhere |
| One-pass polish (PopMyVideo) | Finished clip → post-ready Reel | ~3–5 min | Free trial → Creator/Pro | Not a full NLE or clip finder |
Whisper-class engines across CapCut, Submagic, Veed, and similar tools typically land 95%+ on clean English audio and drop toward 85–90% with accents, jargon, or noise — so every path still needs a proofread pass for names and product terms.
Path 1: Instagram’s built-in auto captions
Fastest if the video never leaves Instagram:
- Create a Reel and add your clip
- Open Captions (or the captions sticker / auto-captions control in your IG version)
- Generate, fix typos, pick a basic style
- Publish from the draft
Use when: you’re posting once, English/Hindi-clear audio, and you don’t care about exporting a branded MP4 for TikTok and Shorts too.
Skip when: you need the same burned-in look across platforms, word-by-word animation, or graphics timed to claims. Instagram captions are a publish convenience, not a polish workflow.
Path 2: CapCut Auto Captions
CapCut remains the default because captions live next to the rest of the edit:
- Import the clip
- Text → Auto Captions → language
- Fix transcript errors and awkward line breaks
- Style font, color, animation; nudge position into the safe zone
- Export, then upload (and usually disable TikTok/IG auto-captions so you don’t get double text)
Typical cost for a clean 15-second talking-head: 10–25 minutes if the transcript is clean; longer when CapCut splits lines badly or you chase a Submagic-style bounce by hand.
Use when: you’re already cutting, trimming, and layering in CapCut. Captions as a free step inside an editor you own is still the best price.
Skip when: the footage is already final and CapCut’s timeline is the reason the Reel sits in Drafts. Caption-only or polish apps win on speed once assembly is done.
For silent product clips that need sound accents instead of speech captions, see Add Sound Effects to Silent Reels on Your Phone — different problem, same “don’t rebuild the timeline” idea.
Path 3: Caption-only apps
Apps like Submagic, Captions, Just Captions, and similar “auto subtitles” tools optimize one job: speech → styled burned-in captions.
Common pattern:
- Import from camera roll
- Auto-transcribe
- Pick a preset (karaoke highlight, bold stroke, brand font)
- Export MP4 (sometimes SRT too)
Strengths: fastest path to the bouncing-word Reels look; some run on-device for privacy; batch-friendly for agencies.
Limits: when the clip also needs a checkmark on a stat, a burst on the hook, or an impact on a product drop, you’re opening a second app. Caption-only tools don’t replace timed motion graphics or SFX — and PopMyVideo’s sound layer is timed SFX, not background music beds.
Use when: transcript + caption style is the only missing layer, and you already have effects elsewhere (or don’t need them).
Path 4: One-pass polish (captions + accents together)
If the job is “finished clip → post-ready Reel,” captions are necessary but not sufficient. Mute viewers need words; retention often needs punctuation on the hit.
PopMyVideo is built as that polish layer on Android and iOS — overlays on your original footage, not AI video generation and not a CapCut replacement:
- Import one clip you’ve already cut (~30 sec)
- Analyze speech/visuals for moments worth enhancing (~1–2 min)
- Preview animated captions synced to speech, plus optional motion graphics and timed SFX on the hits (~2 min)
- Regenerate any moment you don’t like, export vertical (~1 min)
Under five minutes of hands-on time when the cut is done and you want captions plus accents without opening a timeline.
Tradeoff: you choose from generated options, not pixel-perfect keyframes. For coaches, podcast clips you’ve already exported, and single-take Reels, that’s usually the point. For a six-layer brand spot with licensed music and custom type systems, stay in CapCut, Premiere, or After Effects.
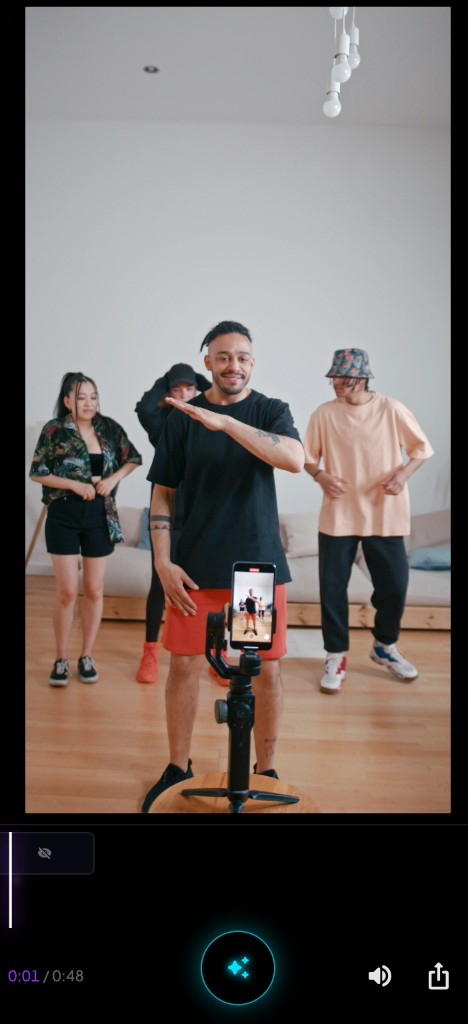
Same pixels underneath. The export is what changed: readable on mute, finished enough to post.
Burn-in vs platform captions (don’t double up)
| Format | What it is | Short-form default? |
|---|---|---|
| Burned-in | Text rendered into the MP4 | Yes — styling control |
| SRT / sidecar | Separate file viewers can toggle | Better for long-form / accessibility |
| Platform auto-captions | IG / TikTok / YouTube generate on upload | Fine as backup; clash if you also burn in |
For Reels and Shorts: burn in, place text in the middle third, high-contrast (white + black stroke still wins), then turn off the platform’s auto-captions if both would show. For YouTube long-form, upload SRT (or both).
When to use which
| Situation | Pick |
|---|---|
| One IG Reel, no cross-post | Instagram Captions |
| Still cutting B-roll and transitions | CapCut Auto Captions |
| 20 clips/week, caption presets only | Caption-only app |
| Cut is done; need captions + timed polish tonight | PopMyVideo |
| Custom type system, licensed music bed, multi-track | CapCut / Premiere / AE |
| Finding the viral moment in a 2-hour podcast | Clipper first (Descript, etc.) — then polish |
Honest split: CapCut wins when editing and captioning are the same session. Caption-only apps win when style libraries and batch volume matter. PopMyVideo wins when the clip is already good and the missing piece is post-ready polish — animated captions with motion graphics and SFX on the hit, not another hour on a timeline.
The practical takeaway
Auto captions on phone are a solved transcription problem. The ranking question is workflow fit.
If you only need words on screen, Instagram or CapCut is enough. If you need the Submagic-style caption look at volume, use a caption-only app. If the clip is finished and you want a Reel that reads as produced — captions timed to speech, graphics and optional impacts on the punchlines — import once, polish in one pass, export, and post.
Proofread names. Stay in the safe zone. Don’t stack burned-in text with platform auto-captions. That’s the whole checklist.